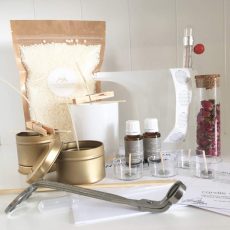
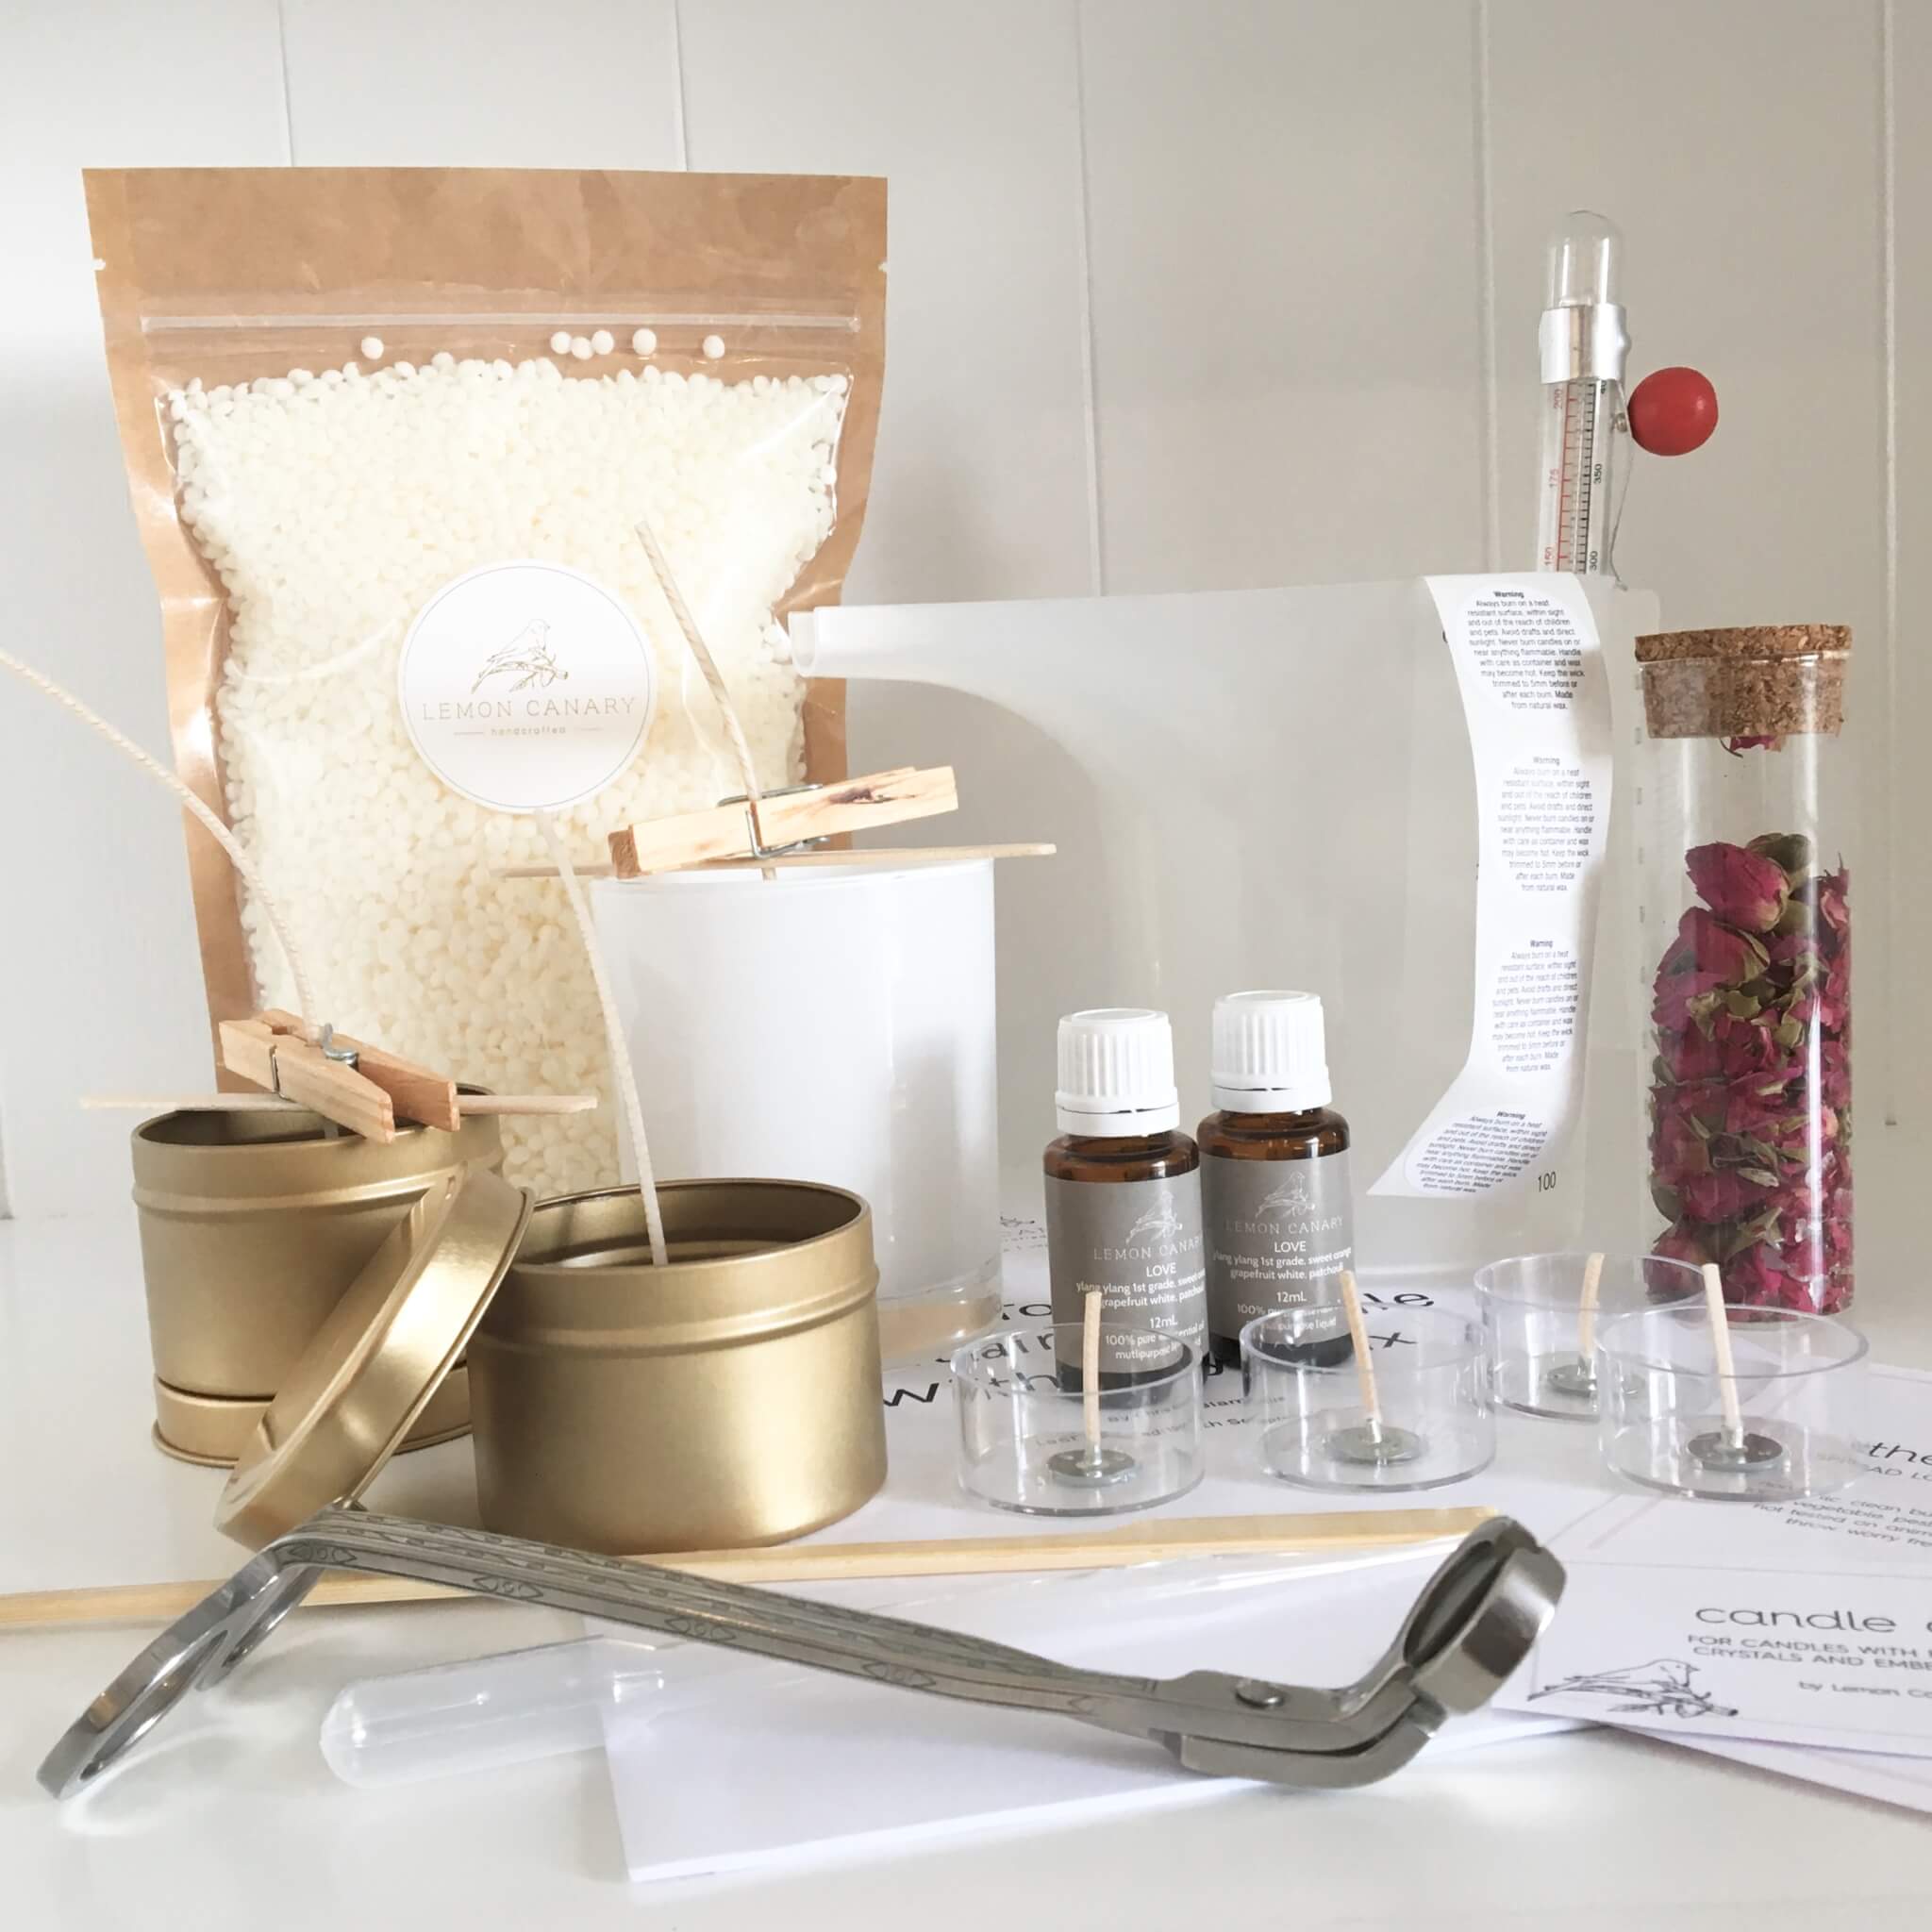
 Luxury Soy Candle Making Kit - By Lemon Canary Australia
 Subtotal: $89.00
How To Make Natural Scented Soy Wax Candles In A Container
SOY CANDLE MAKING SUMMARY
In a nutshell (for those who won’t read this whole info guide:))
Time needed: 1 hour
How To Make Natural Scented Soy Wax Candles In A Container (In A Nutshell)
- Set up your containers / vessels
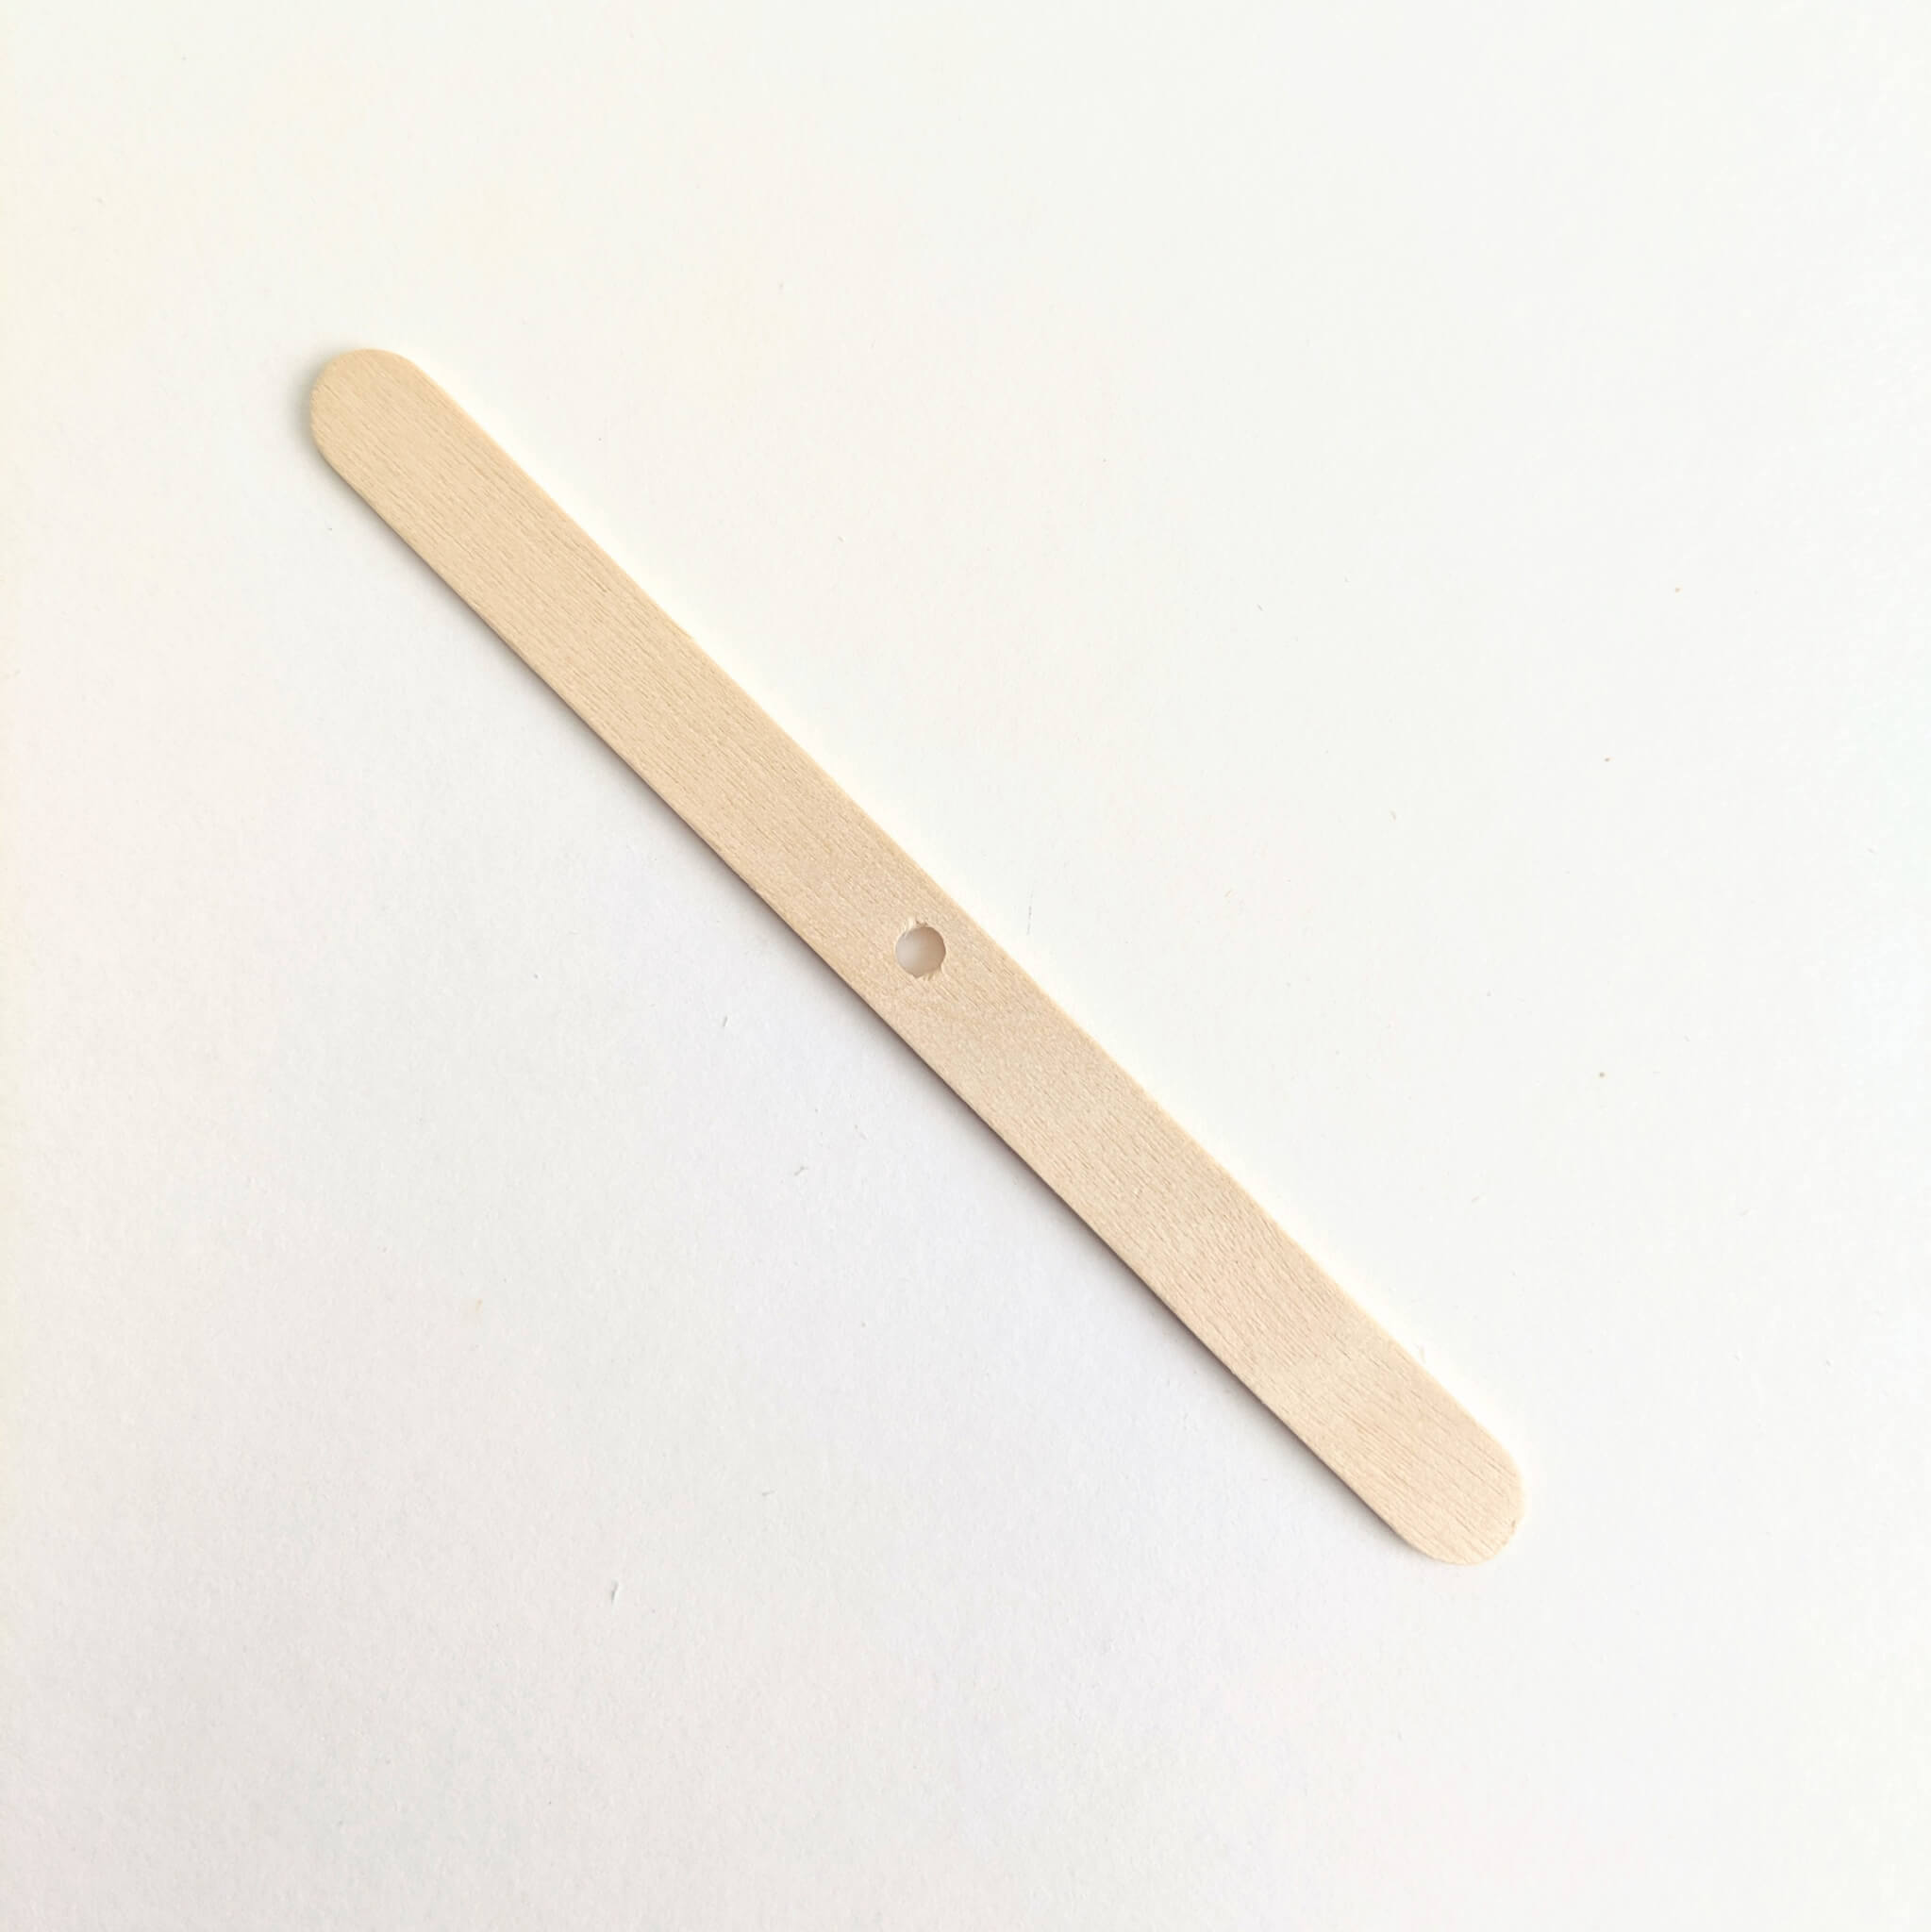
Ensure vessel is completely clean and dry before starting. Any residues, dirt and water may affect the end result. Securely fit the wick to the centre of the vessel by using the sticker and pressing down firmly. Centre the wick using the wick holder (paddle pop stick) then gently pull to straighten wick. Use the wooden peg to hold in place.
- Melt the wax
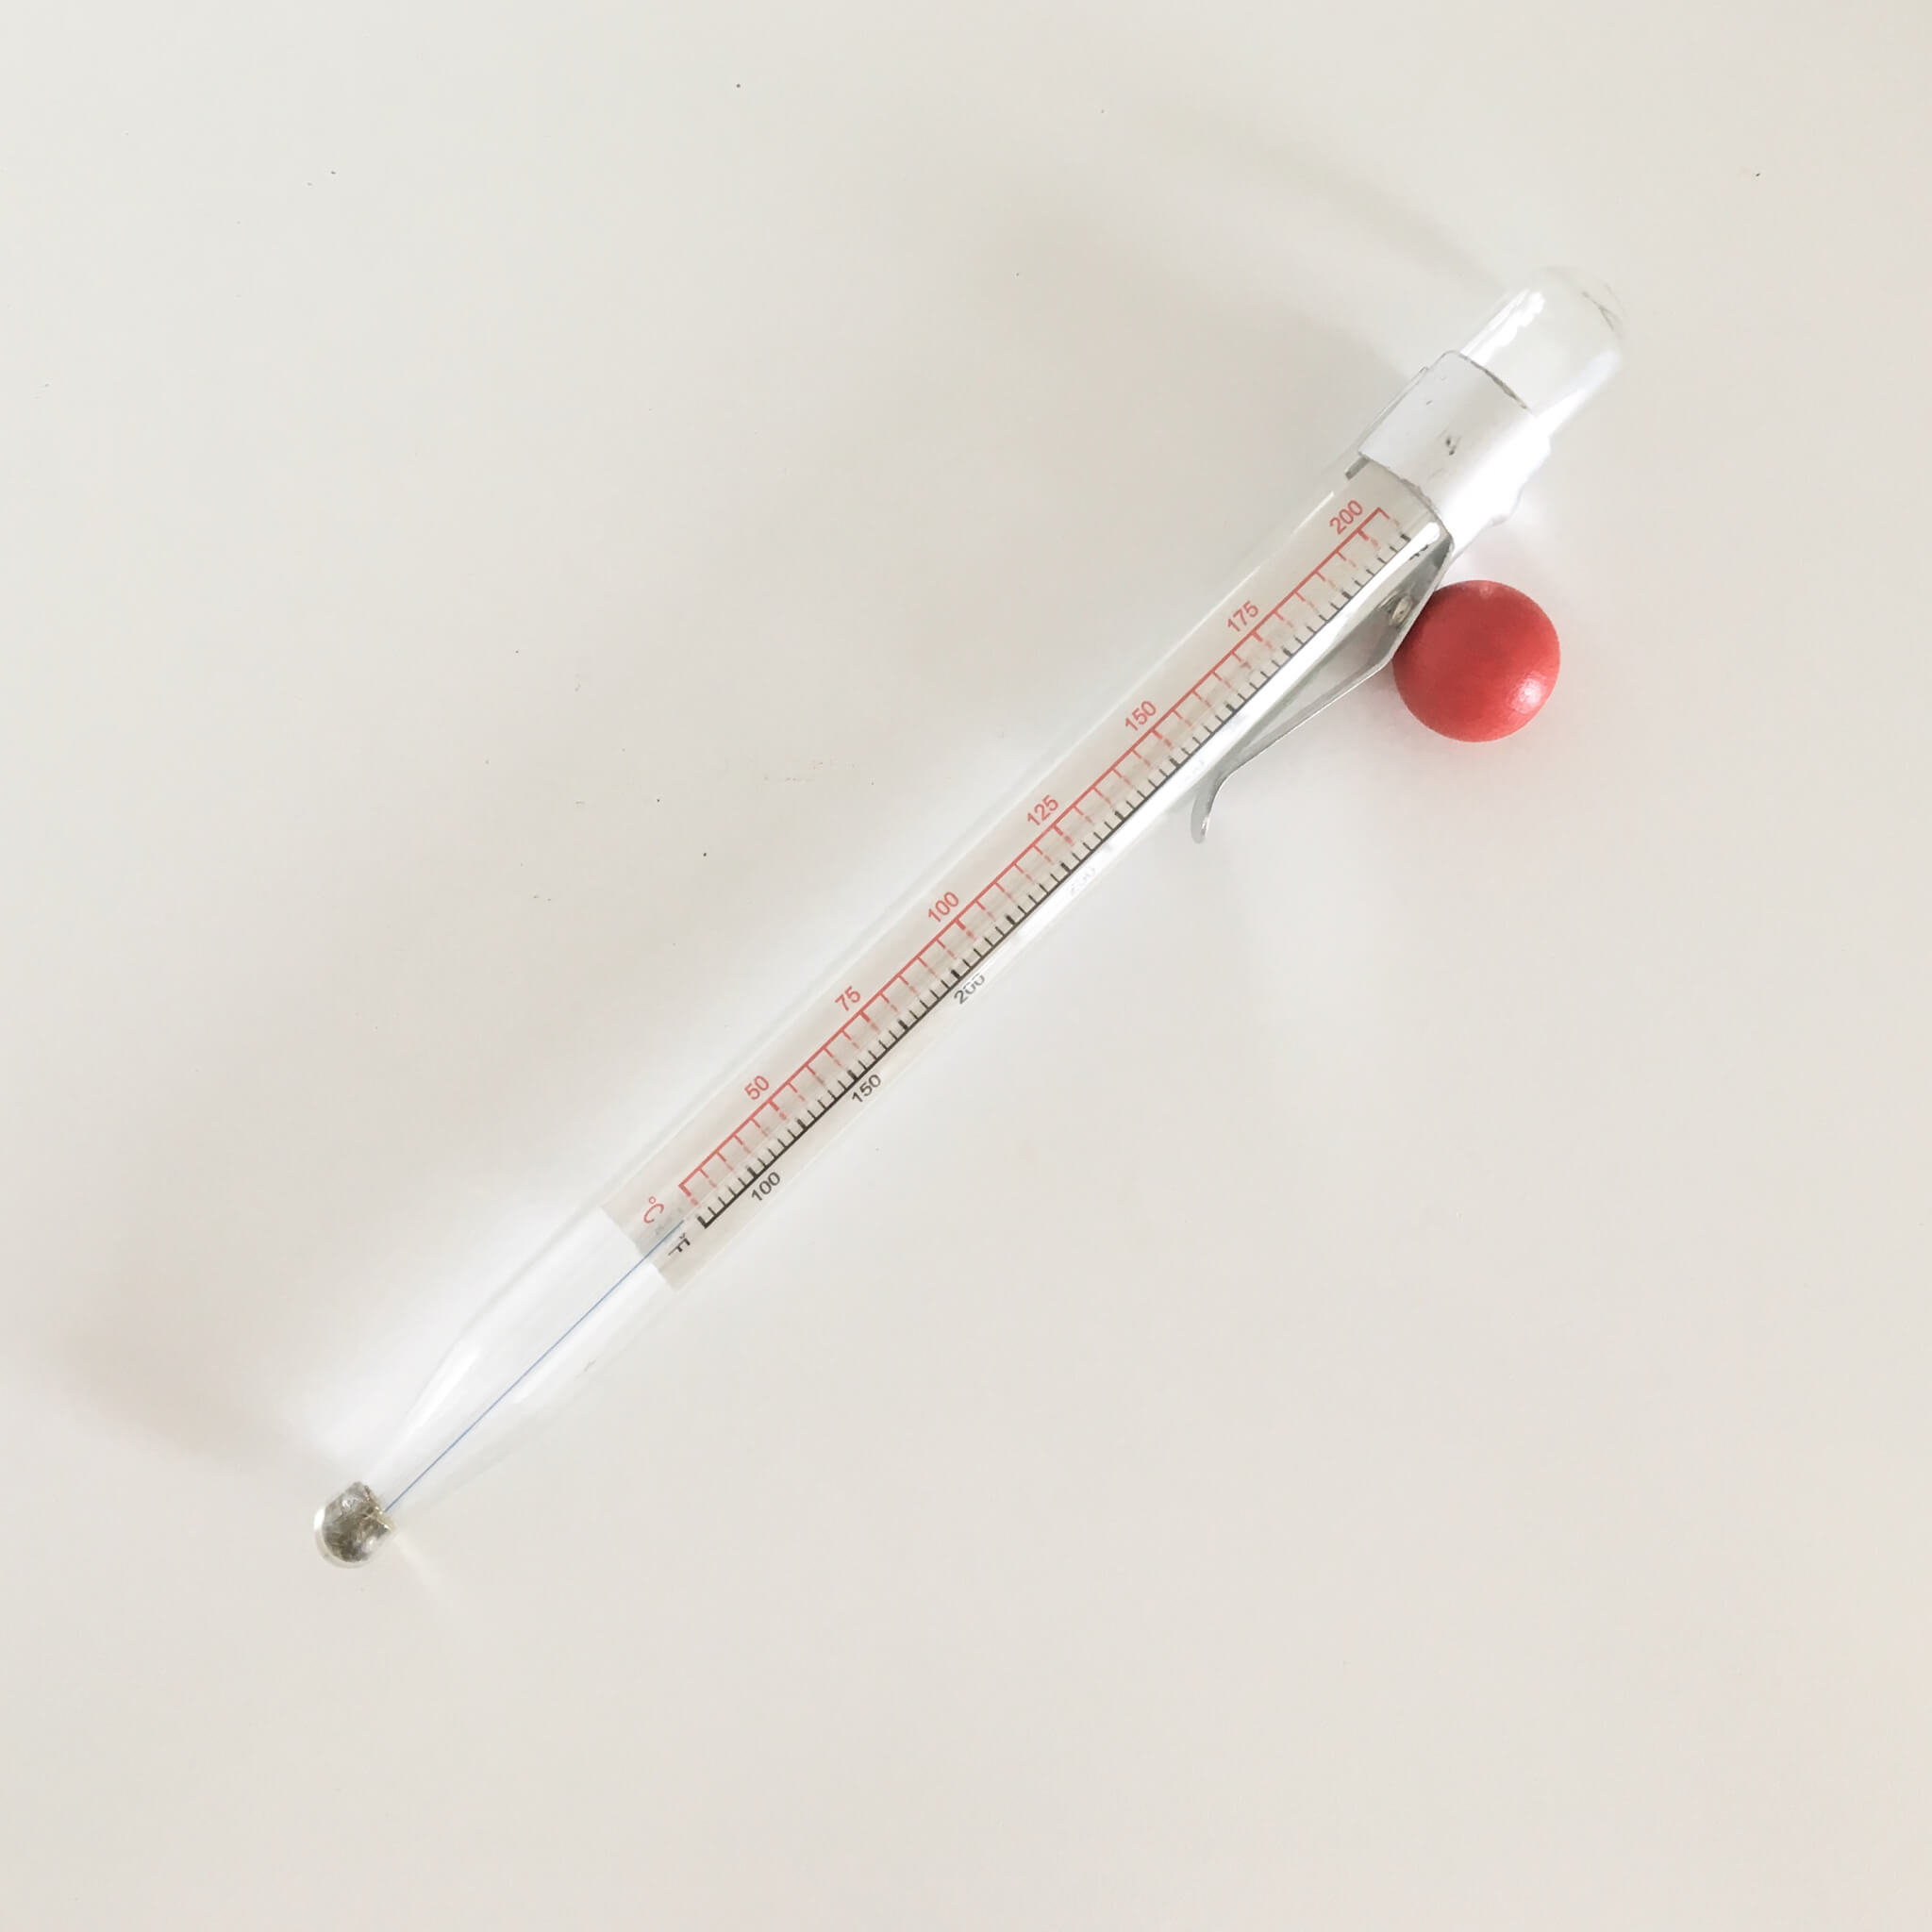
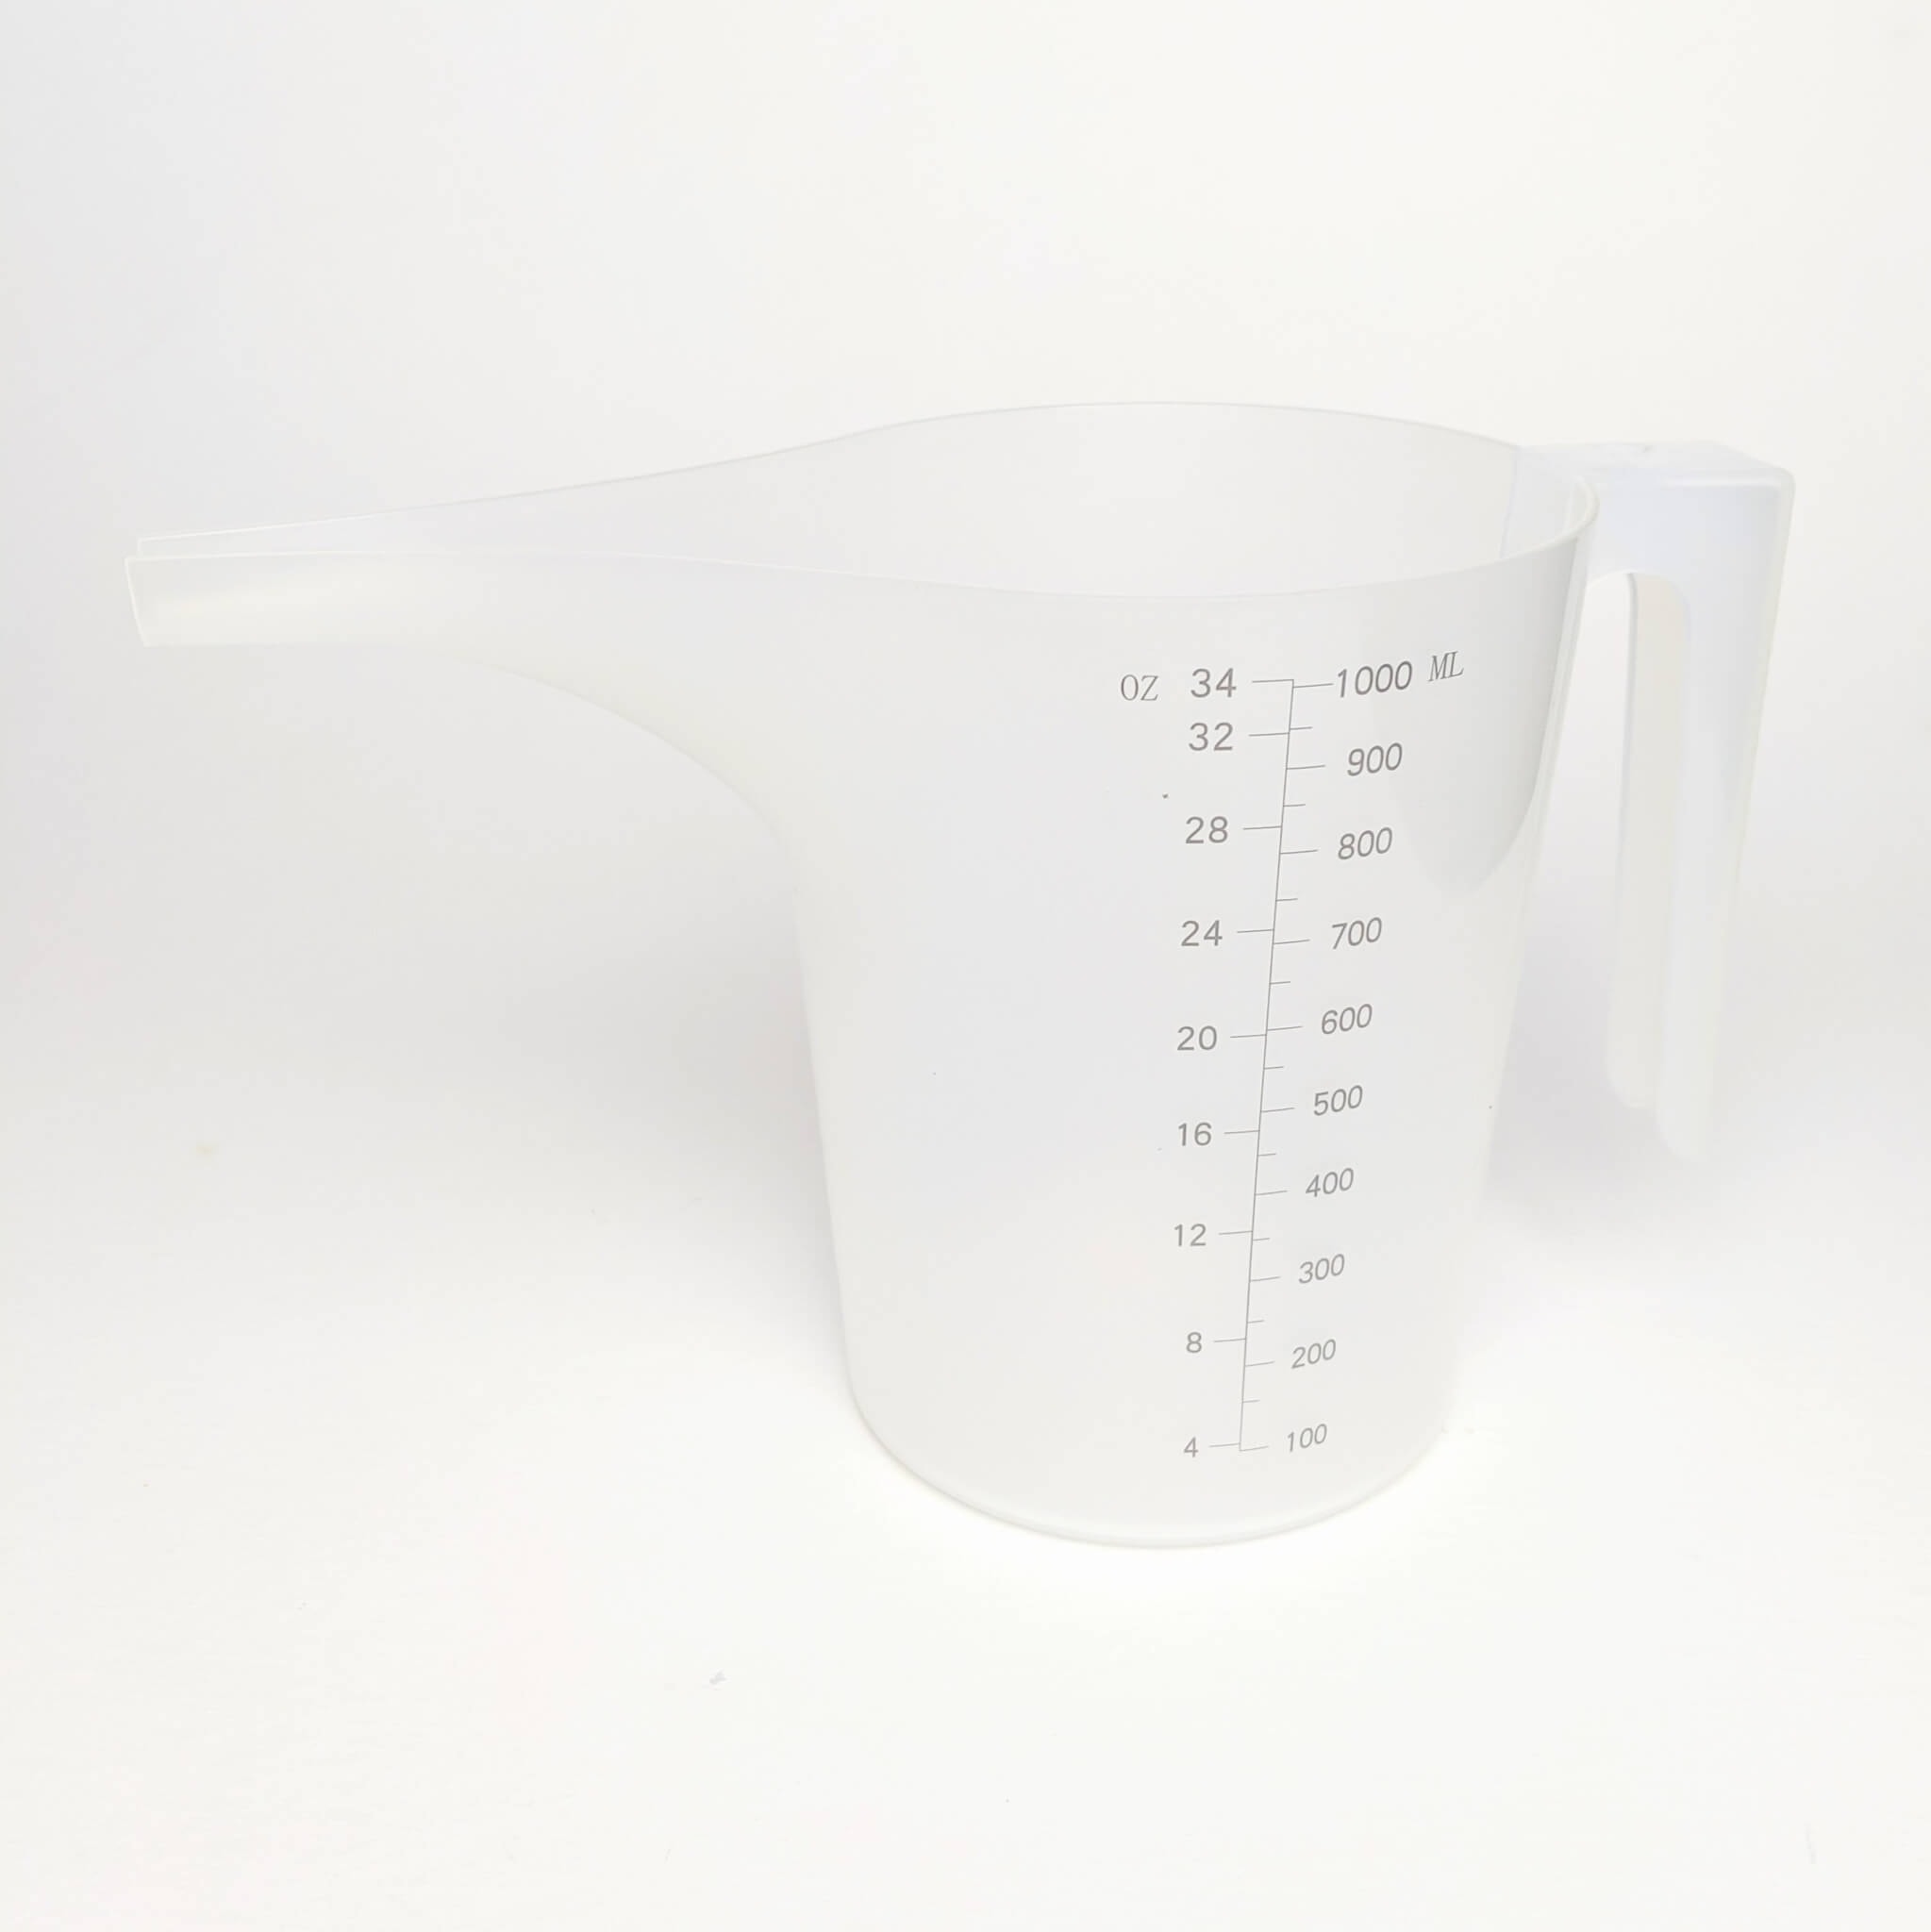
Use the double boiler method for melting the wax. A saucepan with water and a glass bowl fitted on top works quite well. Melt so the wax is completely liquid. Use an infrared or mercury thermometer to heat wax to 65°C-85°C. Then pour wax into your pouring jug. Tare the weight of the jug then weigh to measure the amount of wax in grams. We do not recommend using a microwave for melting wax.
- Mix in the scent
Add the correct amount of scent to the wax when the wax is 60-65°C. Then mix with a spoon or disposable wooden stick. When using natural 100% essential oil scents, add from 1% up to no more than 5% of the total weight. If you are using fragrance oils up to 10% is usually fine. So a 200g candle will have up to 10g of essential oil or up to 20g of fragrance oil. Keep in mind 20 drops is approximately 1ml.
- Pour the candle
When the temperature reaches 55-60°C, pour the mixed scent and wax into the candle container at a steady pace but not too slowly. Do not fill all the way to the top. Leave at least 1cm from wax to the top of the container. Now wait for a few hours to allow your candle to set.
- Once set, trim the wick and finish the candle
Once the candle is set you can remove the peg and wick holder. Wipe down any drips and splashes. Trim the wick to approximately 6mm long. Stick the warning label underneath. Then leave it overnight to set fully or if you can’t wait just light it straight away. Why not?!
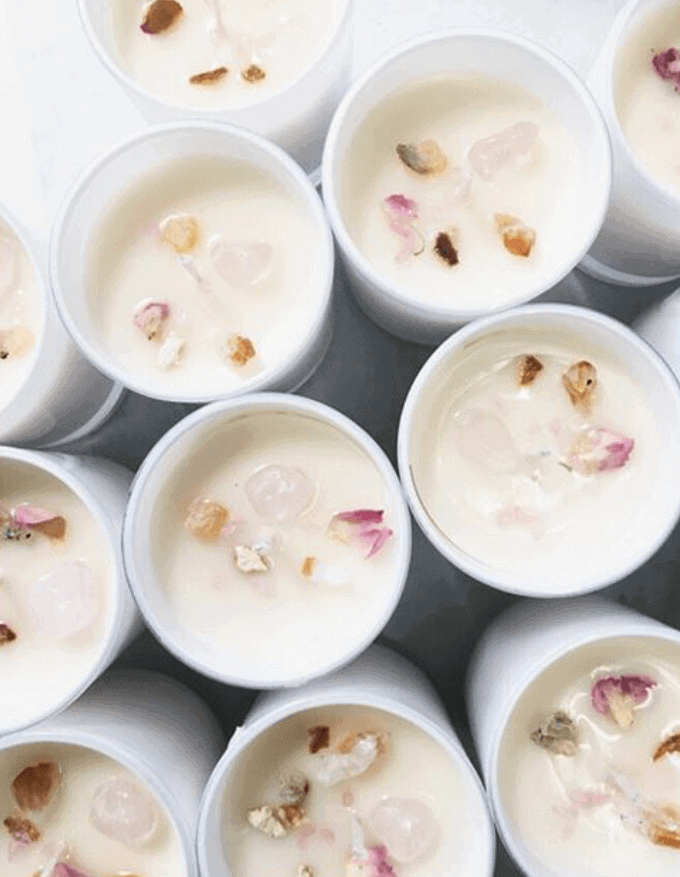
- Optional: Decorate your candle
After the candle has set you can re-heat the surface of the candle and sprinkle some crystal chips, dried flowers or herbs to make it special and one of a kind. Some rose dust, gold leaf or glitter can be a great way to finish off your design.
- Congratulations. Enjoy your handmade candle.
Now it’s time to burn and enjoy your homemade, beautifully scented soy wax candles.
For those of you who would like more details about candle making keep reading. Here’s a more detailed guide to help you on your journey…

PART 1
What do you need to start making candles?
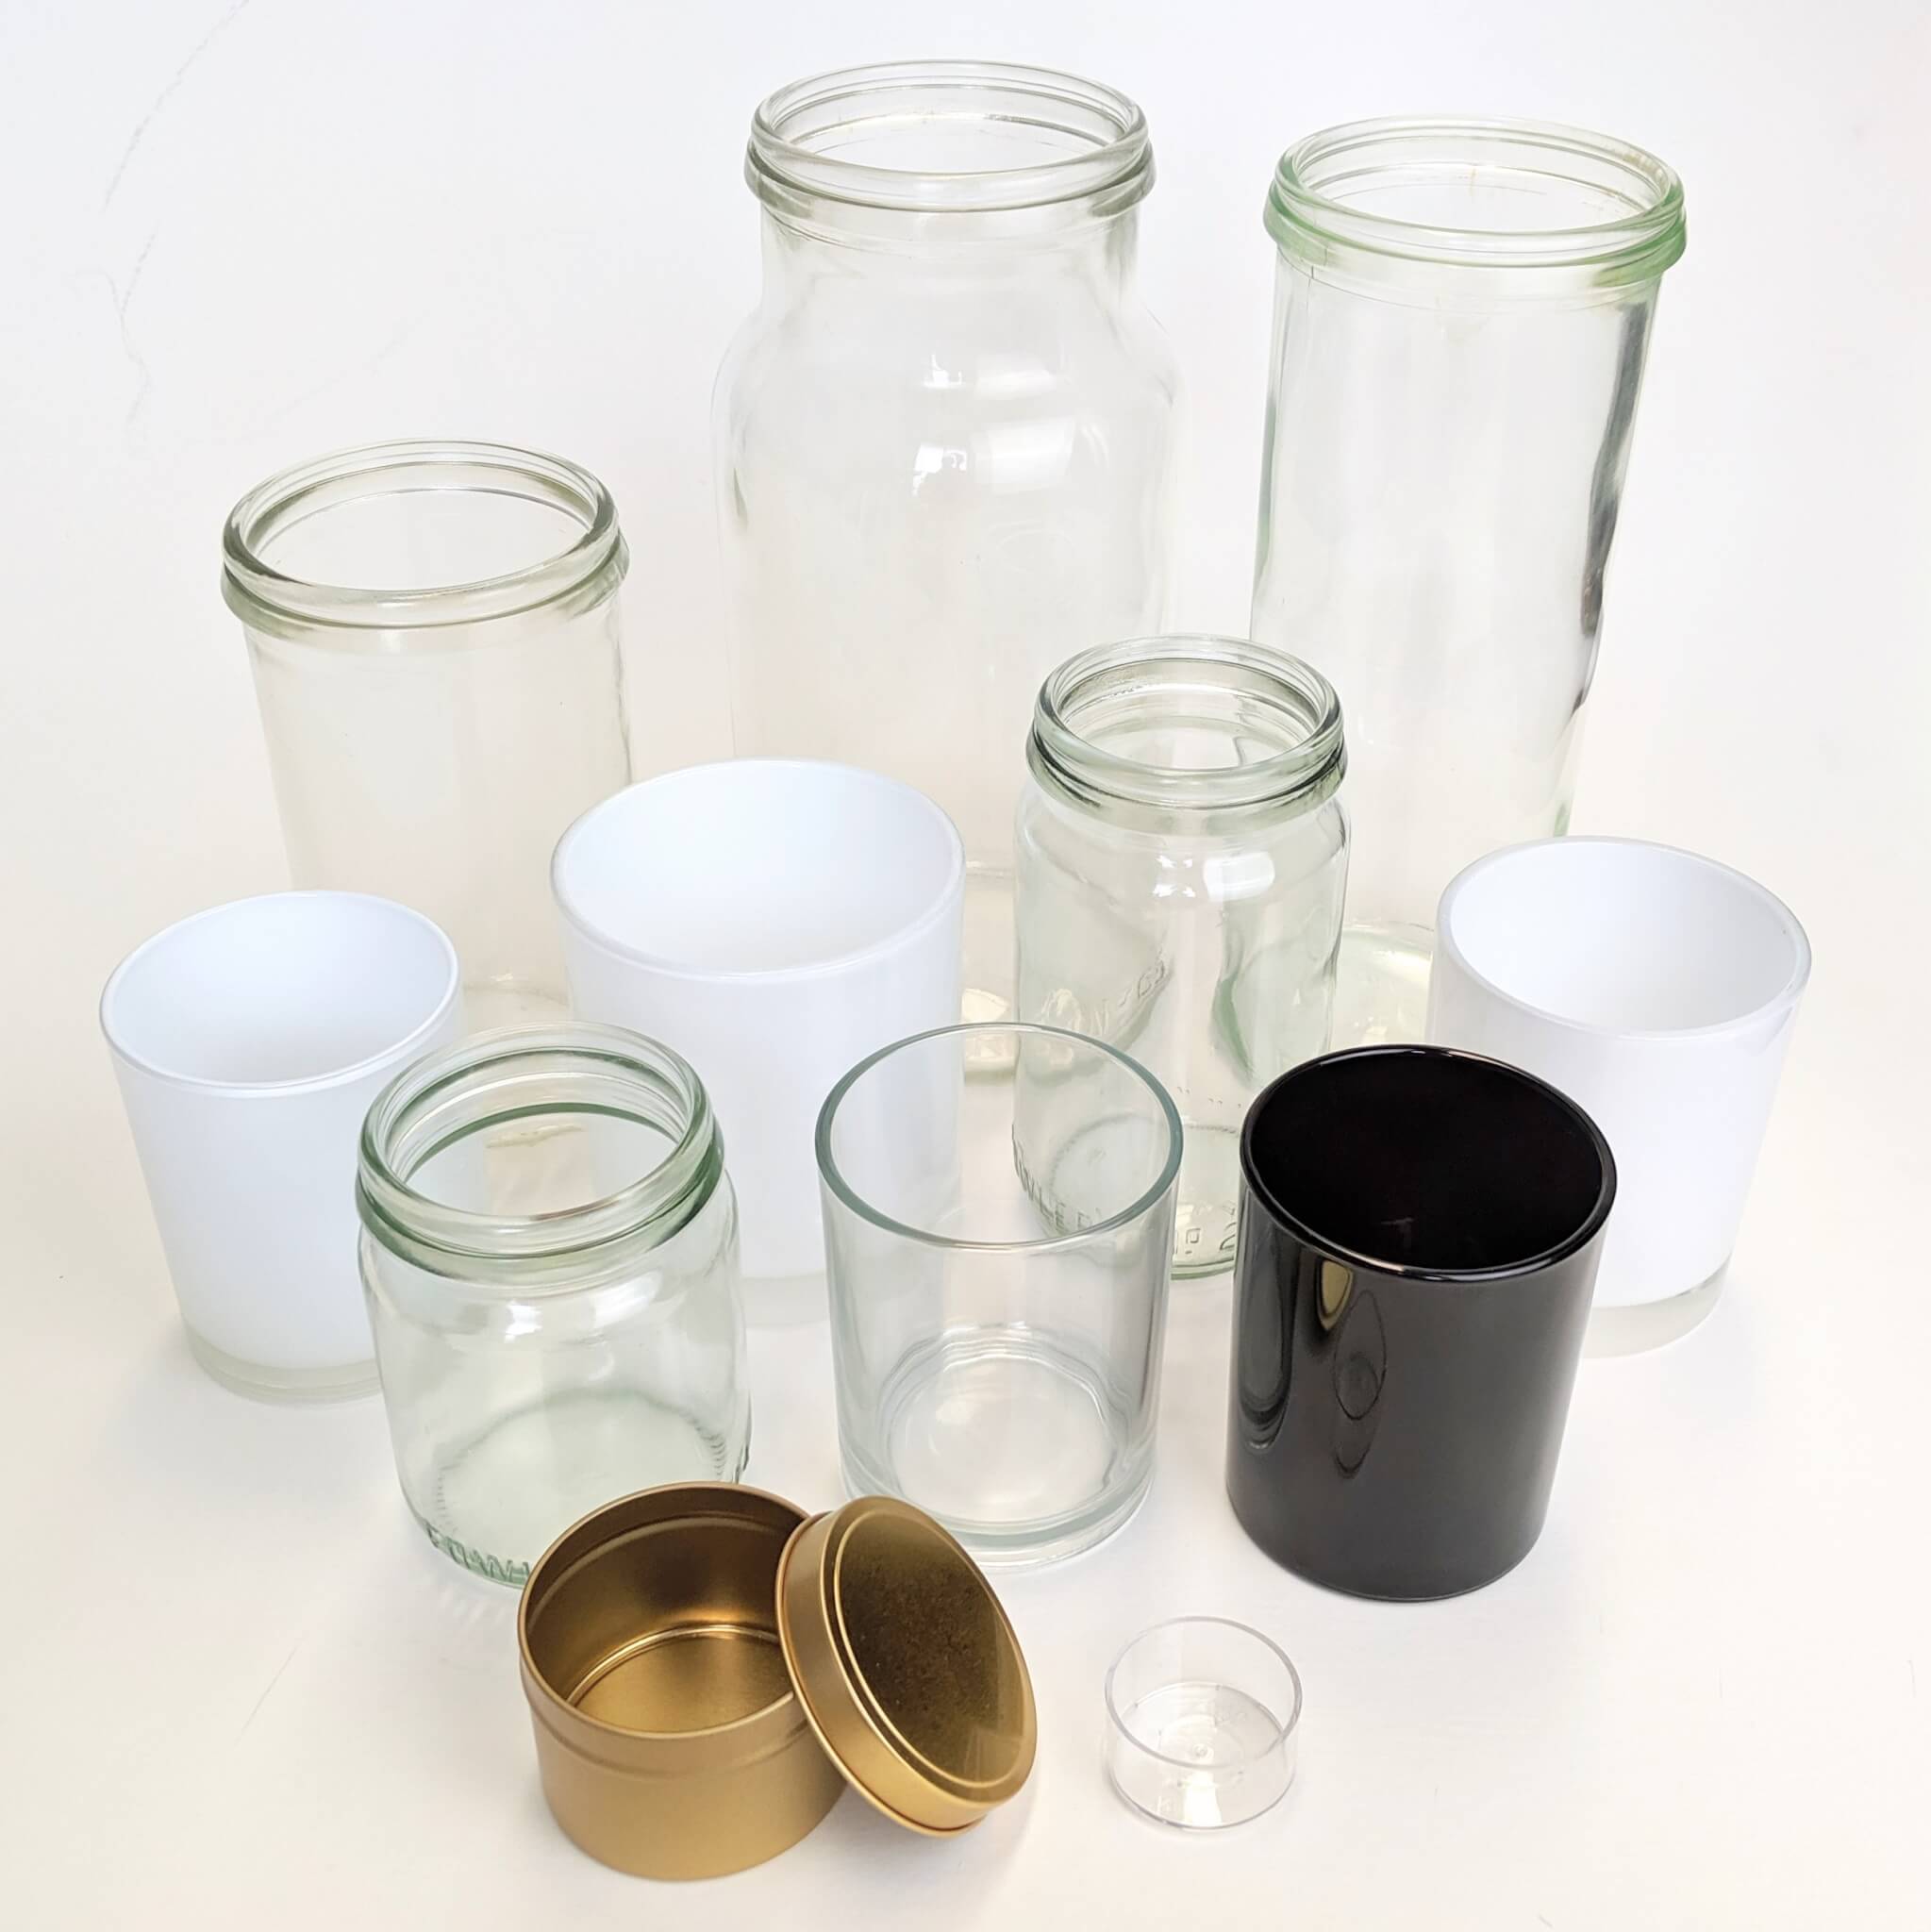
- Container / Vessel
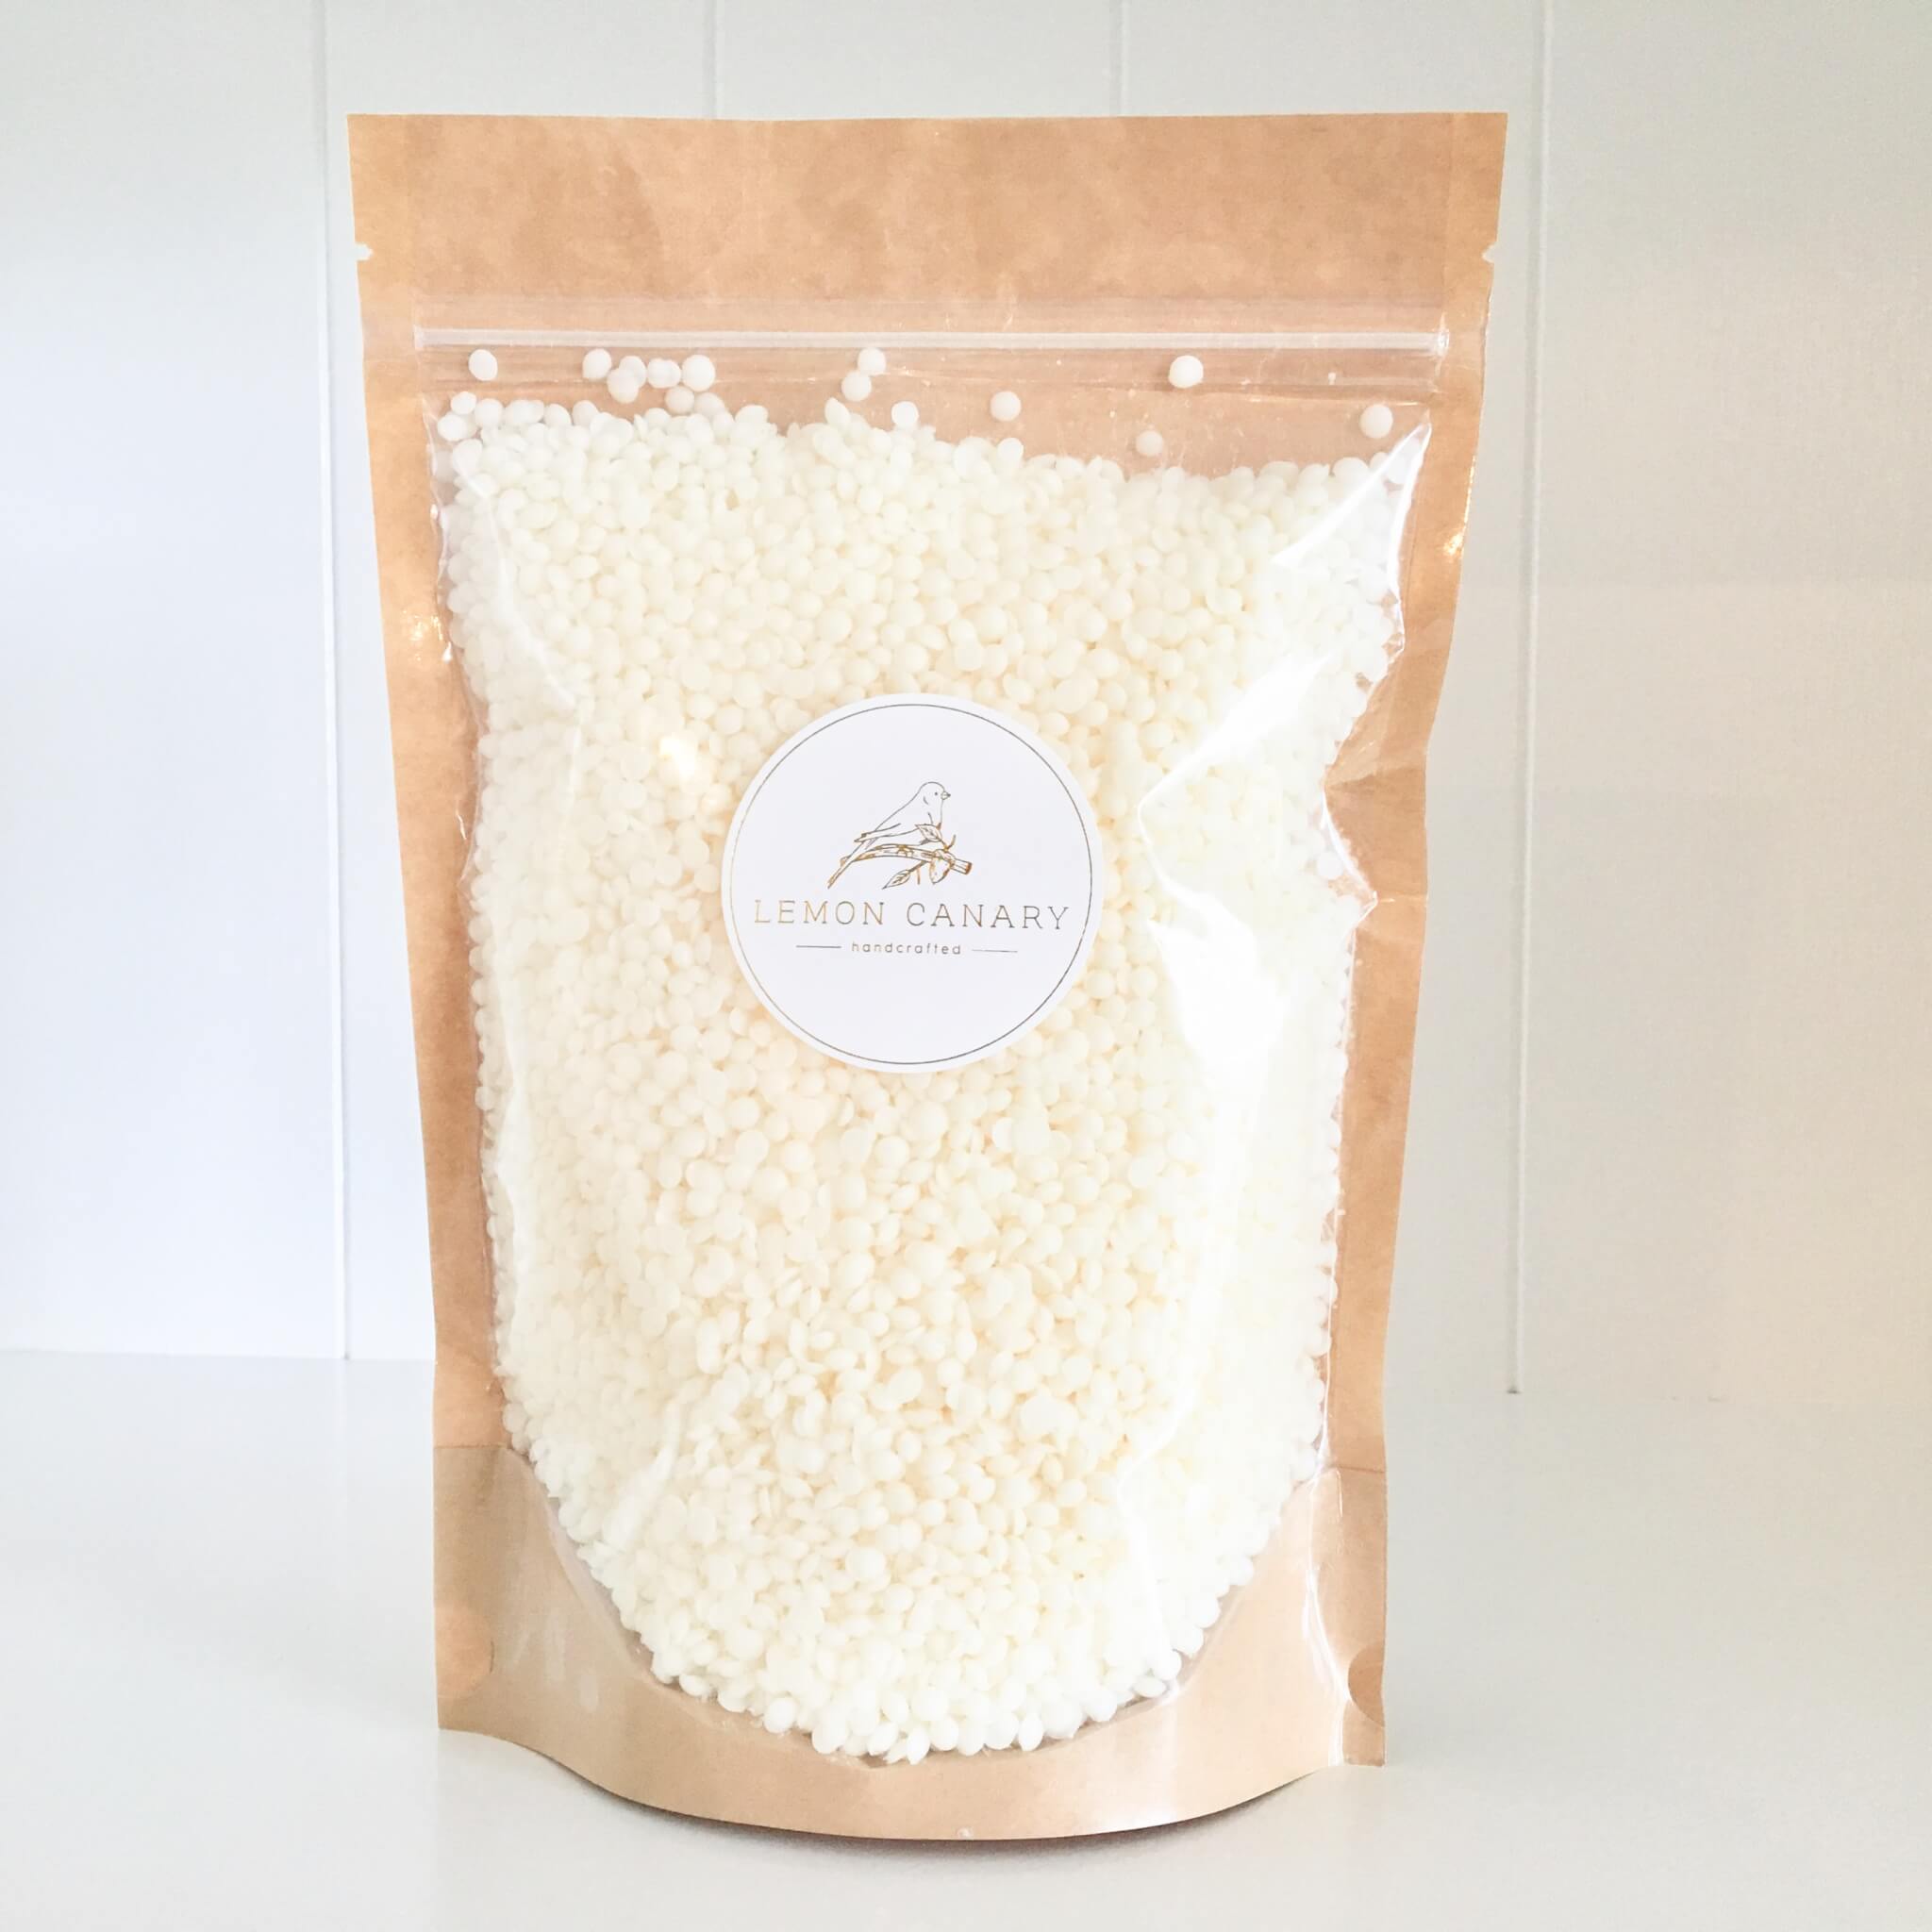
- Natural Wax (Beeswax, Coconut Wax, Soy Wax or a blend of these waxes)
– Palm Wax note: Very little palm wax is sustainably produced. Despite the certification programs in place. We do not use Palm Wax.
- Wicks

- Wick stick down stickers (also called wick stickums)

- Wick holders and wooden pegs
- Thermometer
- Double boiler or saucepan for heating water with saucepan/glass bowl to place in saucepan. A double boiler is easily created by using a saucepan for heating water and a glass bowl to place on saucepan for the wax. Please ensure there is a gap between the water in the saucepan and the bowl holding the wax. Wax and water should never be mixed.
- Wooden stirrer or large spoon
- Kitchen scale
- Measuring jug

- Workspace coverings. Working with wax can get messy so it’s a good idea to cover work surfaces with thick paper, old tablecloths or sheets. Lay something on the floor to catch any spills.
- Apron & Disposable Gloves
- Paper towel to wipe up wax before it dries
A great candle making kit will have everything you need to get start.
Optional items:
- Essential oils for scenting. Add a maximum of 5% essential oil to your wax. So for a 200g candle the maximum essential oil you should add is approximately 10g. This is a maximum so you could add much less if you like. Remember when measuring, 20 drops is approximately equal to 1ml. You can add whatever essential oils you like. Use them alone or in combination and get creative.
- To secure wicks in place a glue gun is an alternative to the stick down wick stickers. Or you can even dip the wick in the wax and use it to stick the wick to the base for an even more natural candle.
- Extinguisher. If you heat wax up to its flash point it will ignite…. Alway best to be prepared.
PART 2
What are your expectations?
- Candle making is a journey not a destination… so enjoy the journey, have fun, experiment and expect some learning experiences.
- Don’t expect your first candle to be perfect. Take the pressure off, smile and play without judging yourself.
- If you make a mistake remember you can re-melt the wax and start again. Be sure to keep the correct melting and pouring temperatures in mind when remelting as well as the maximum scent load of the wax.
PART 3
How to choose a container for candle making
The container or glassware for your candle should be suitable for candle making and be able to handle heat over extended periods of time. If you are unsure do some testing. Keep in mind that a vessel that is not designed for candle making may be unsafe as it can break and cause damage etc.
PART 4
How to choose a wax for candle making
Choosing a wax for making your candles is a very personal choice. Your choice will be determined by your values, the importance you place on health, wellness, sustainability, purity and what you want from your candle. Here are some of the waxes available for making candles.
- Soy wax – soft wax
- Beeswax (Not Vegan) – very hard wax, natural product, very expensive to buy good local organic beeswax, if it’s cheap bee-ware, when using 100% beeswax cracking can be a problem. A blended soy wax and beeswax candle can be a wonderful combination.
- Palm wax – hard wax, bad publicity due to unethical deforestation, very natural and sustainable waxes are available.
- Paraffin wax – hard wax, petroleum based, great scent throw, when a wax isn’t mentioned on a label this is nearly always what is used.
- Coconut wax – very soft wax, not suitable for making by itself, usually added to a soy or beeswax blend, makes for a whiter wax.
Sometimes you won’t be able to get everything you want from a particular wax so blending can be an option. Wax selection for candle companies is more difficult due to freight, temperature and humidity conditions between the point of making, storing and delivery. For example: a candle would need to be able to travel from extreme heat to extreme cold or visa versa.
PART 5
How do you select the right wick for your candles?
- Measure the diameter of the container you will be pouring wax into.
- Use a selection guide to choose the correct wick for your wax and container.
- Buy a few different wick sizes to play with because you may not get the perfect result with your first wick choice.
- Enjoy making your candles and if it takes a few attempts to get the right wick for your container, that is very normal even for master candle makers.
There are lots of variables that affect the best choice of wick. Wick selection guides are helpful but in most cases you will have to do some trial and error testing. But there are those joyous moments when you choose the right wick first time…. Yippee!
Note 1. We like using wicks with the buttons for gluing or sticking down already fitted. The choice is yours.
Note 2. If you have a larger vessel you may have to double or triple wick to ensure the wax pool reaches the edges.
Beeswax Note:
Wick selection guides are not always available for beeswax. Beeswax is very hard and burns hot. That’s why it needs a different wick to soy candles. It also burns differently if you are using 100% beeswax or a beeswax and coconut wax blend. Generally choosing a wick that is 2-3 sizes larger is a good place to start testing in your beeswax candles. This guide relates to soy wax candles only.
PART 6
How to heat and pour your wax for candle making
Always follow the instructions and guidelines of the wax you have purchased.
As a general guide here are some common instructions…
- Fix the wick or wicks to the inside base of the container. Cut the wicks to 1 cm above the wick holder to remove the overhang. Ensure wick is centred.
- Melt wax
- Heat wax to the level recommended in the wax instructions.
- Do not heat to above 85°C because the wax can start to evaporate at this temperature.
- Never directly heat wax in a pot or pan. We do not recommend using a microwave because controlling the temperature and ensuring safety is difficult.
- Do not overheat the wax.
- Do not pour water into melted wax.
- While melting keep the wax uncovered. If you use a lid you can get condensation on the covering that can drip into the wax while melting – you don’t want boiling water to condense on the lid and drip into your wax. If wax ignites DO NOT use water to extinguish. Use a fire extinguisher.
- While you’re waiting for the wax to melt you can prepare your containers.
- Ensure a consistent ambient temperature of 21°C-23°C
- Add the scent (1%-5% of total weight for essential oil or 4%-10% for fragrance oil) when the wax temperature reaches the level recommended in the wax instructions (usually 50°C-60°C). When the wax is luke warm it’s time to add the scent.
- Stir the scent and wax gently and thoroughly for 2 minutes but not so vigorously that you create too many air bubbles in the melted wax. Ensure you can no longer see the difference between the wax and the scent. Once the wax and scent are mixed stop stirring to avoid bubbles in the wax.
- Pour when the wax temperature reaches the level recommended in the wax instructions (100% soy wax is usually 45-55°C).
- Pour steadily at a good pace. Do not pour slowly.
- Ensure candle containers are warm to touch.
- Ensure wicks remain centred and in position.
- Allow candles to cool slowly for 6-8 hours. Candles will take 24 hours to set properly. Ensure the candles remain at a consistent temperature and are not affected by drops in temperature, drafts or breezes. Do not move candles once poured as this will cause an uneven surface and mess.
- Trim wick to 5 mm in length above the level of the wax.
- Apply a safety sticker underneath the container.
PART 7
How to clean up soy candle wax mess
Soy and coconut wax is water soluble and reasonably easy to clean off surfaces and tools with a scourer and hot soapy water. In many cases a wet wipe will even do the job. For waxes where hot soapy water is ineffective you can use some eucalyptus oil on the really stubborn mess. If you use eucalyptus oil or something similar be careful because some surfaces and surface coating can be easily damaged. It’s always best to test first in an inconspicuous area.
PART 8
Safety in candle making
- Do not heat wax in microwave. Wax can ignite when it reaches its flash point.
- Do not leave heating wax unattended.
- If you are adding essential or fragrance oils to heated wax ensure the flash point of the scent is not greater than the temperature of the wax.
- Wear gloves and goggles. Protect yourself from splashes.
PART 9
Troubleshooting in candle making
A. Before we start troubleshooting.
- The recommended pour temperature of your wax is only a recommendation. It’s a great starting point. Finding the right pour temperature for your fragrance and current weather conditions may require some testing. When testing pour temperatures we recommend you do so in small increments of 5°C. As weather conditions change be aware that you may have to make some adjustments to the way you make candles to compensate.
- When testing pour temperatures or other parts of your candle making method, it’s a great idea to keep a notebook on hand to record your results.
B. How to stop frosting when making a candle.
Frosting looks like a white haze on the surface of a candle. It’s very common and normal for plant based waxes especially natural waxes. Just relax, your candles are fine and will work perfectly even if frosted.
Solution 1. Learn To Love Frosting
Everyone who makes candles should expect some frosting. It doesn’t affect the quality of your candle. It is only an aesthetic difference. If you like, just ignore it.
Solution 2. Pour Temperature
You can minimise frosting by playing with and testing different pour temperatures. This will be somewhat dependent on your weather conditions.
Solution 3. Stable Temperature and Conditions For Setting
Ensure your candles cool slowly and evenly without temperature changes. Keeping candles away from cold conditions especially overnight will help. Some people even like to keep their candles warm overnight.
Solution 4. Older Waxes
Older waxes tend to have more frosting issues so try to use waxes that are less than 12 months old.
C. How to avoid lumpy tops when making candles.
Solution 1. The Pour Temperature
The most common reason for lumpy candle tops when making candles is due to the pour temperature. Your pour temperature is the temperature of the melted wax just before pouring your candles. It’s not the temperature of the wax before you add your fragrance or essential oil. In most cases you can fix lumpy top issues by decreasing or increasing the pour temperature. The best way to do this is by testing. Do this by changing your pour temperature by 5°C each time you pour a test candle until your candle tops are smooth and lovely. If you are not using a thermometer it would be a good idea to get one. Getting your pour temperature right without a thermometer of some sort is almost impossible.
Solution 2. The Essential Oils or Fragrance Oils
Some essential oils and fragrance oils used for scenting can contribute to lumpy candle tops. One solution is to reduce the amount used and continue to test different pour temperatures.
Solution 3. Change in room temperature
Your procedure for making candles might be working perfectly but then un-expectantly lumpy tops start appearing. Room temperature and weather conditions will affect your candle making. On cold days, heating your glass vessels so they are warm to touch before you pour can be a good solution. Experimentation is required.
Solution 4. A Quick Fix
Another way to solve a lumpy top problem on the candles you make is to use a heat gun on a very low setting (so there are no splashes) to melt the top 2 or 3 millimetres. Wah-lah… smooth tops every time!
D. How to avoid wet spots on the side of the candle vessel that look like a big air bubble.
Wet spots are not wet. They are actually an air bubble on the side of a container between the wax and the glass. What has happened, is the wax has pulled away from the side of the glass instead of adhering to it. Temperature changes cause waxes to contract and expand. Once this contraction happens there’s no turning back… the wax will not re-adhere to the glass. If you leave your candles out overnight it’s very common for the drop in temperature to cause the wet spotting effect.
If the container is not a clear glass you will probably never know this happens and it won’t matter. Wet spots or air bubbles on the side of the vessel only slightly change the look of the candle. Performance will not be affected. Have a look at some of the most high end and most expensive candles available, you will still often see wet spots.
Solution 1. Pour Temperature
Wet spots are more often caused by pouring at too higher temperature. Decreasing your pour temperature can help solve a wet spot problem. Keep in mind that in some cases increasing your pour temperature can work too if this wet spot effect occurs while the candle is setting.
Solution 2. Wax Choice
Some waxes have better adhesion qualities than others.
Solution 3. Keep Your Candles Warm Overnight While Setting
If the wet spotting happens overnight try keeping your candles in a warm place away from the cold without any draft or breeze. Ensure the temperature and condition remain consistent overnight.
Solution 4. Pre-Heat Vessels Before Pouring Wax
Heating your vessels so they are warm to touch can help reduce wet spots in some conditions. Testing is required.
Solution 5. Clean the inside of the vessel
A vessel interior that has dirt or residue may experience glass adhesion and wet spot issues.
Solution 6. Sometimes You Can’t Stop This Happening
The air conditioning in a retail outlet, temperature changes between warehouses, trucks and courier vans and general weather changes can all cause wet spots. Don’t worry, be happy!
E. How to stop hollowing and sink holes when making candles.
When candles cool too fast, hollows and sinkholes occur. The wax on the outside and top of the candle starts to set while the middle is still warm and liquified.
Solution 1. Pour Temperature
If this is happening, the first part of your candle making method to think about is your pour temperature. Hollowing and sinkholes usually happen when the candle wax pour temperature is higher or lower (usually higher) than it should be. So incrementally change your pour temperature and test to see if this fixes the problem.
Solution 2. Candle Cooling To Fast
Try to create a consistent ambient temperature of between 21-23°C where you make your candles and store them for setting. Make sure your candles while setting do not experience excessive changes in temperature. Often this problem will occur overnight due to a drop in temperature. Try to also keep your setting candles away from fans, drafts or breezy areas.
Solution 3. Pour Temperature and Cooling Too Fast
The problem may not be one or the other… the problem might be both. Keep that in mind.
Solution 4. Use a heat gun
Use a heat gun on a very low setting (so there are no splashes) to melt the top 2 or 3 millimeters. You may have to poke the sinkhole to open it up before using this method.
F. How to stop a candle from tunnelling in candle making
Tunnelling is when the wax on the outside of the candle vessel is not melting.
Solution 1. Wick may be too small.
Solution 2. Ensure the first time you light a candle you let it burn right to the edge.
Some call this creating candle memory. Basically, a candle will tend to remember it’s first burn and the wax pool will in most cases not go past the point it reached on the first burn.
G. How to stop a candle wick’s flame making black smoke.
Solution 1. Wick is too long
Trim wick before each use to a length of 5-6mm.
Solution 2. Move the candle away from drafty areas.
Solution 3. Reduce the amount of essential oil or fragrant oil scent.
H. Wax pool doesn’t reach the sides of the vessel or wax pool is too deep.
The ideal depth of a wax pool is 6-9mm.
Solution 1. Wick may be too small
Wick may be too small if the wax pool is not reaching the sides and too big if the wax pool is too deep. Do a test burn to find the right wick for your vessel.
Solution 2. Too much colour dye can clog the wick.
Solution 3. Reduce the amount of essential oil or fragrant oil scent used
I. Poor scent throw
Solution 1. Add more scent (or reduce scent… less is more sometimes).
Check your measurements and always measure by weight not volume. For essential oils we recommend a maximum of 5% by weight.
Solution 2. Add fragrance to the wax when the temperature is between 60°C-65°C.
When essential oils and fragrant oils are added to wax when it is too hot you can lose a lot into the air before the candle sets.
Solution 3. Ensure fragrance is fully and evenly mixed before pouring.
Stir lots and ensure the fragrance doesn’t settle. Add fragrance to the wax at a lower temperature helps but it must be mixed well.
J. How to stop a candle wick mushrooming.
Wick mushrooming can occur when the wick chosen is too large for the container used. This is characterised with a flame that burns very bright and excess carbon that falls to the side of the wick and into the burn pool.
Solution 1. Trim The Wick
A wick should be trimmed regularly so it’s no longer than 6mm.
Solution 2. Try A Different Wick
To avoid mushrooming simply use a smaller wick, right wick size for your candle and ultimately solve this problem.
K. How to stop the wax cracking when making a candle.
Solution. Add Softer Wax
Try adding some coconut wax to soften the wax and make it less likely to crack. Cracking is most common with beeswax candles.
L. “I’m using my wax’s recommended pour temperature but there’s still problems.”
You may have been creating amazing candles for some time and all of a sudden for some reason your candles have started having problems. How can this happen when you are doing exactly the same as before. You might be get lumpy tops, holes, pits or wet spots. All else being equal a change in weather conditions is often responsible. It may even only be a change in night time conditions. Do your best to create a consistent ambient temperature of between 21-23°C and continue to test the variables until you reach success. Sometimes persistence is the only thing that will get you there.
If you enjoyed making soy candles and would like to take your candle making to the next level, book in for a private candle making workshop with us. They are fun, informative and a great opportunity to ask questions and improve your skills. We’re looking forward to meeting you soon.
Blessings,
The Lemon Canaries xo
YOU MIGHT ALSO LIKE THIS…
ABOUT
LEMON CANARY
We all have stories… losing loved ones, celebrating milestones, moments of deep gratitude. Sometimes only a special and amazing, one-off, thought-filled, love-saturated gift will do. And that’s what Lemon Canary loves doing best.


